2021년 9월 7일, OpenSSL 버전 3이 릴리즈 되었습니다. 여러 변경 점이 존재하지만, 가장 큰 변화로는 라이선스 문제가 해결되고 Apache License V2 의 오픈소스 라이선스를 갖게 되었습니다(1, 2).
단순하게 사설 키를 생성하는 목적으로는 버전 1 (특정하게는 버전 1.1.1) 도 문제 없이 사용 가능하며, LTS 버전이므로 본 글에서는 버전 1을 기준으로 운영체제 별 OpenSSL 커맨드라인 프로그램을 설치하는 방법에 대해 알아보도록 합니다.
Windows
Windows 는 OpenSSL 이 기본적으로 설치되어 있지 않습니다. 다음의 주소를 방문하여 OpenSSL 바이너리를 받아줍니다.
https://slproweb.com/products/Win32OpenSSL.html
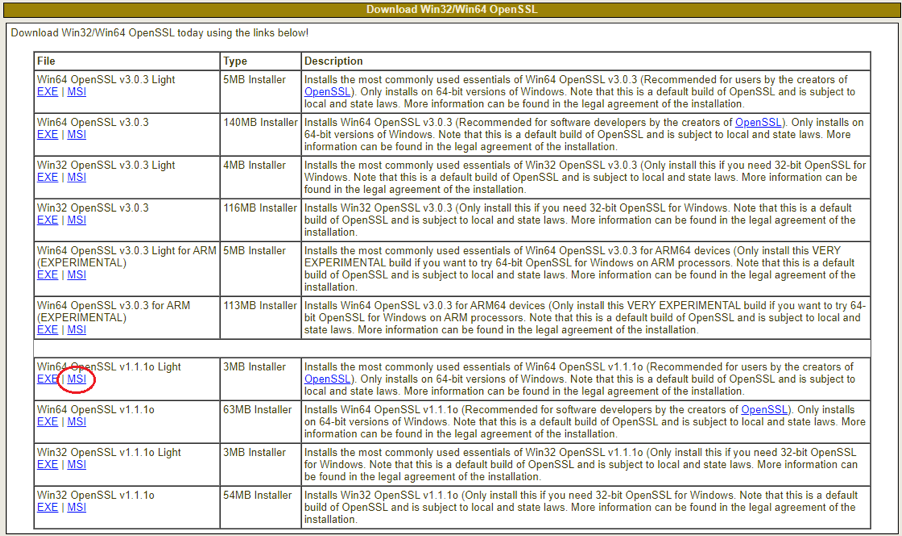
하단의 Download Win32/Win64 OpenSSL 섹션에서 Win64 OpenSSL v1.1.1o Light 의 파일을 받아줍니다. EXE 와 MSI 둘 다 상관 없지만, MSI 로 설치를 진행합니다.
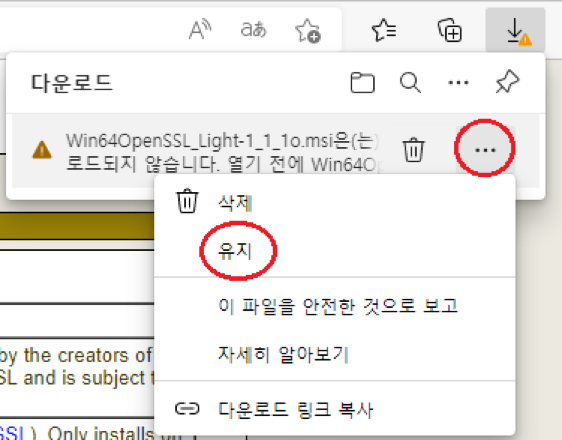
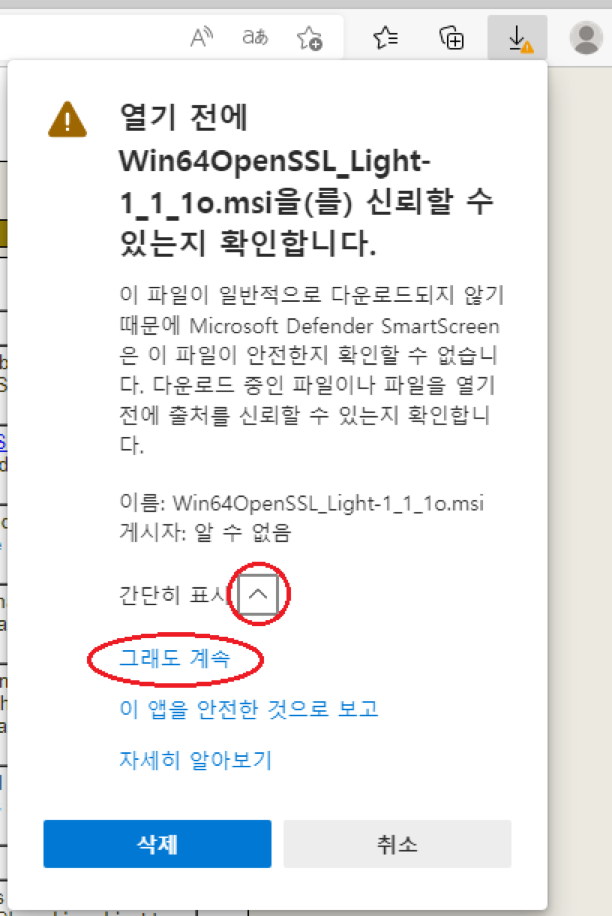
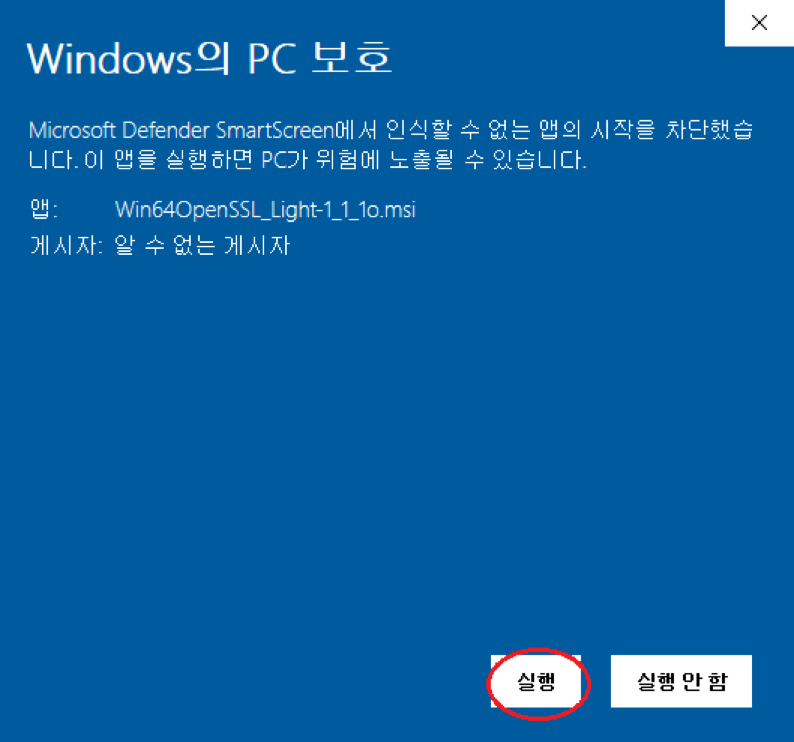
안전하지 않은 파일로 나오는데, 많은 사람들이 다운로드 받지 않으면 윈도우 디펜더가 경계하기 때문에 그렇습니다. 다운로드를 진행하면 됩니다.
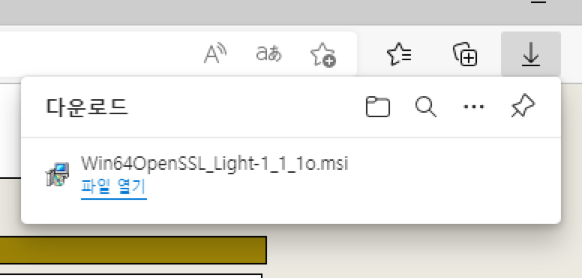
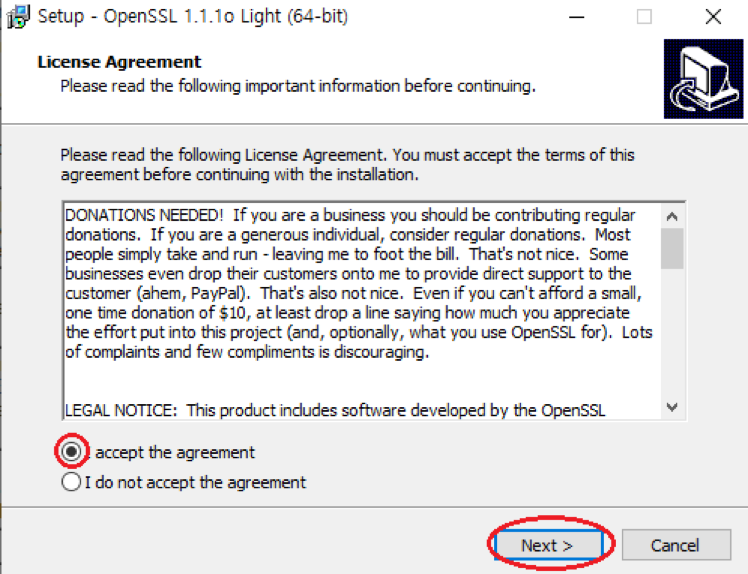
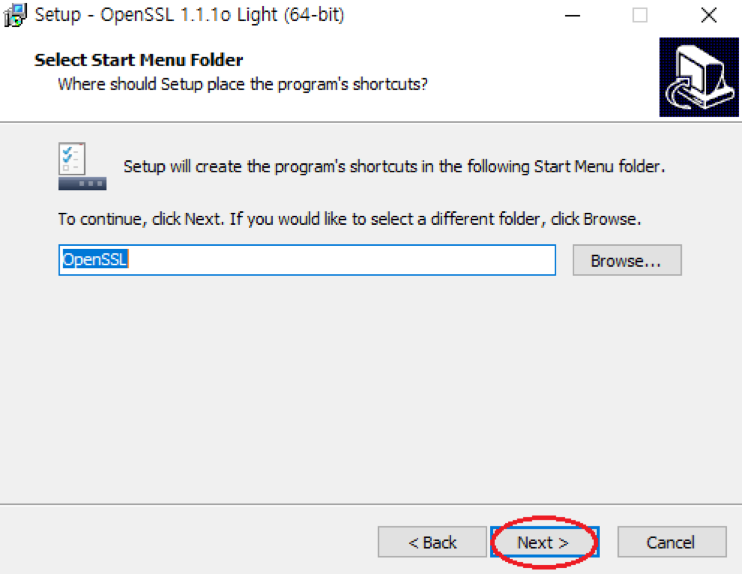
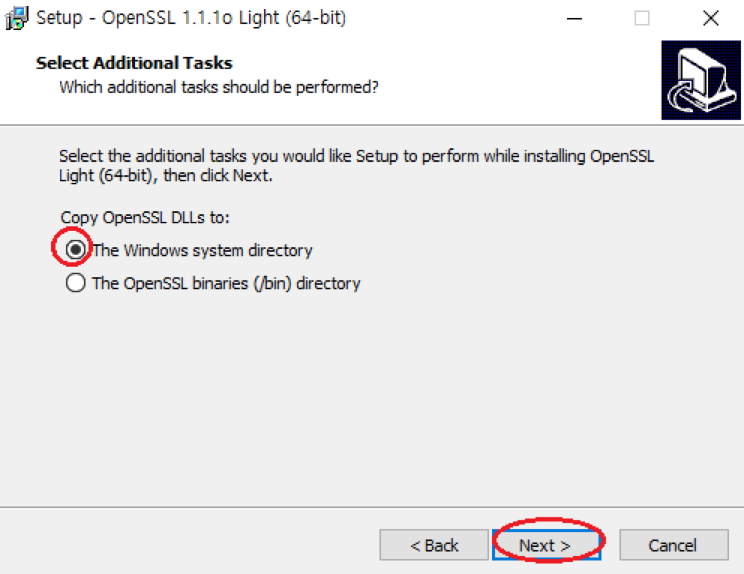
다운로드가 된 이후에 설치해줍니다.
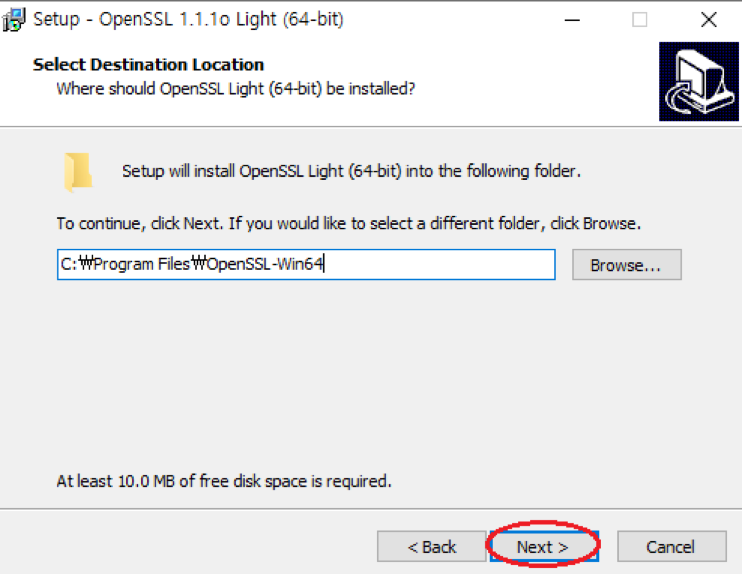

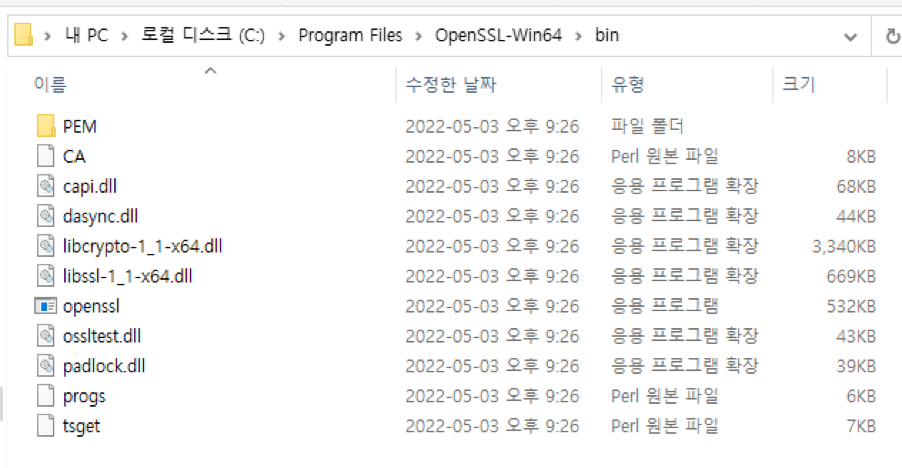
설치가 완료되었으면, C:\Program Files\OpenSSL-Win64\bin 디렉토리에서 openssl 커맨드라인 프로그램을 확인할 수 있습니다.
커맨드라인 프롬프트, 또는 파워쉘에서 사용 가능하도록 이 경로를 환경 변수에 등록합니다.
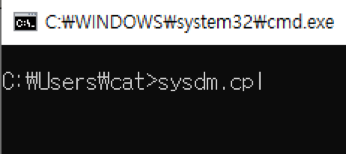
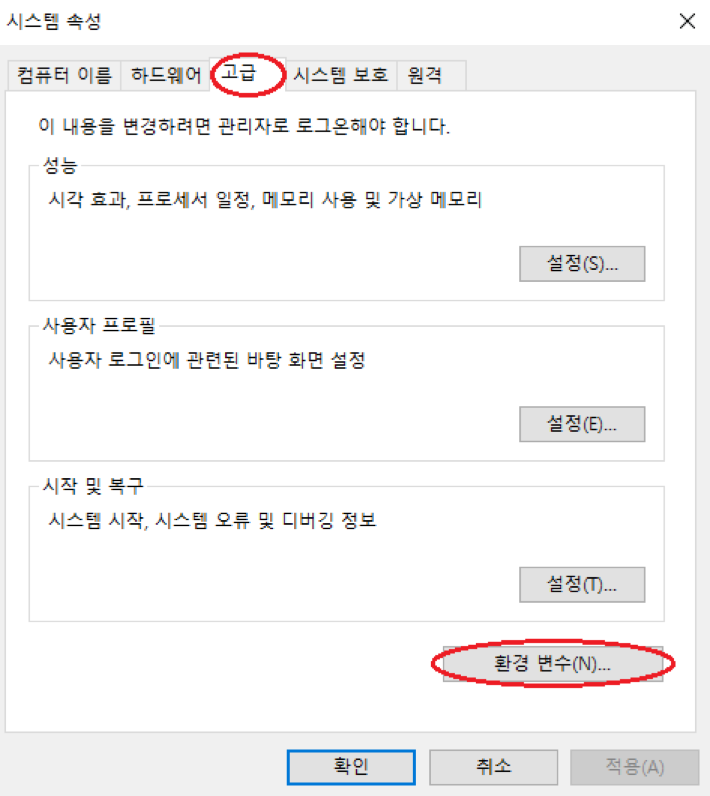
sysdm.cpl 을 입력하여 시스템 속성에 들어간 뒤, 고급 - 환경 변수 를 클릭합니다.
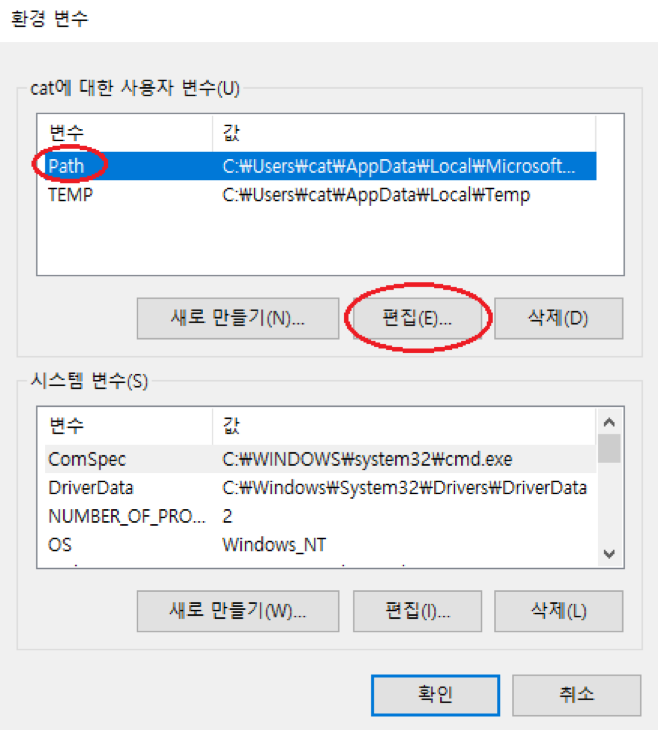
그리고 Path 변수를 선택한 뒤 (Windows 의 경우 대소문자 구분이 없으므로 PATH, Path, path 모두 가능), 편집을 누릅니다.
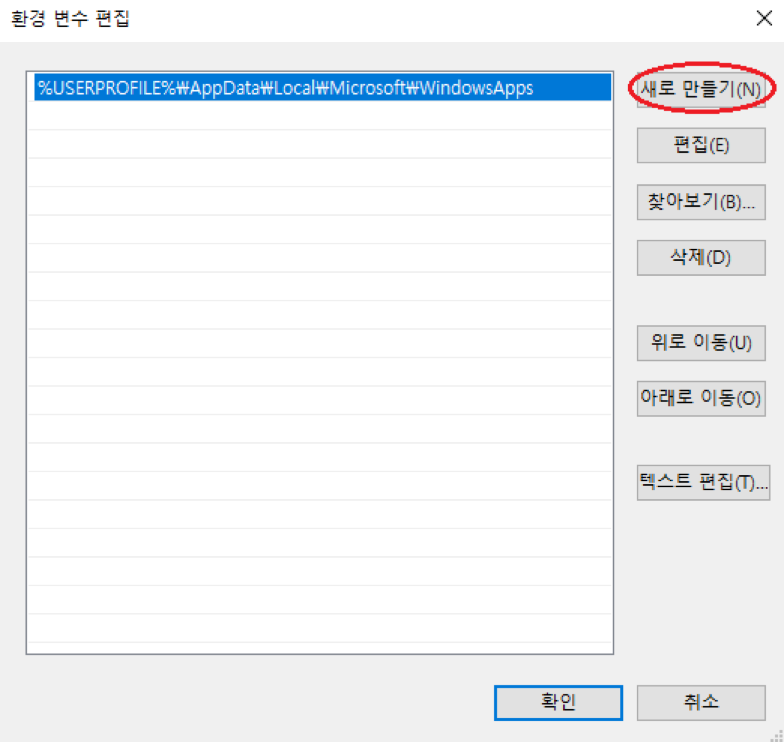
새로 만들기를 누르고, openssl 커맨드라인 프로그램이 있는 경로를 적어줍니다.
C:\Program Files\OpenSSL-Win64\bin
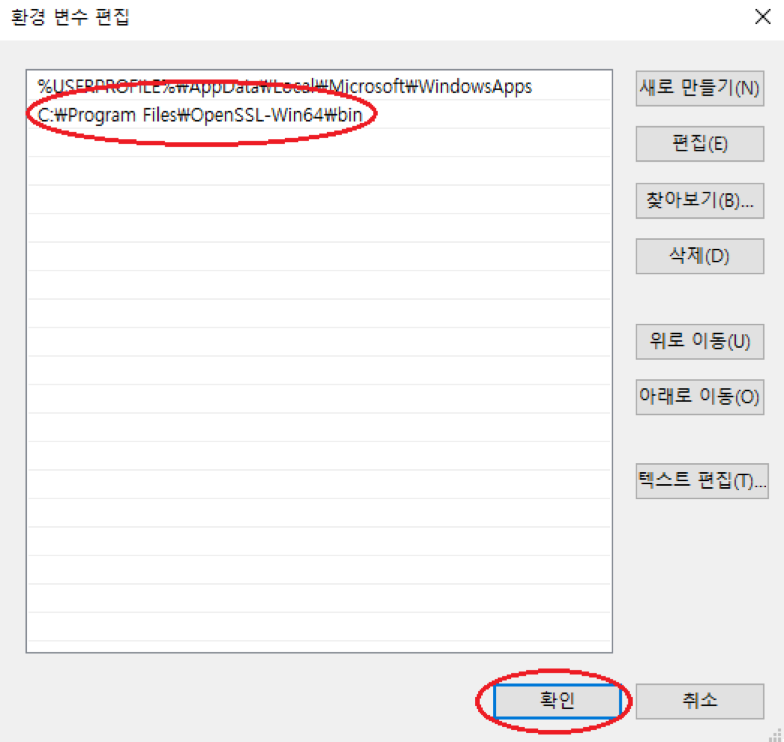
확인을 눌러서 환경 변수를 저장합니다.
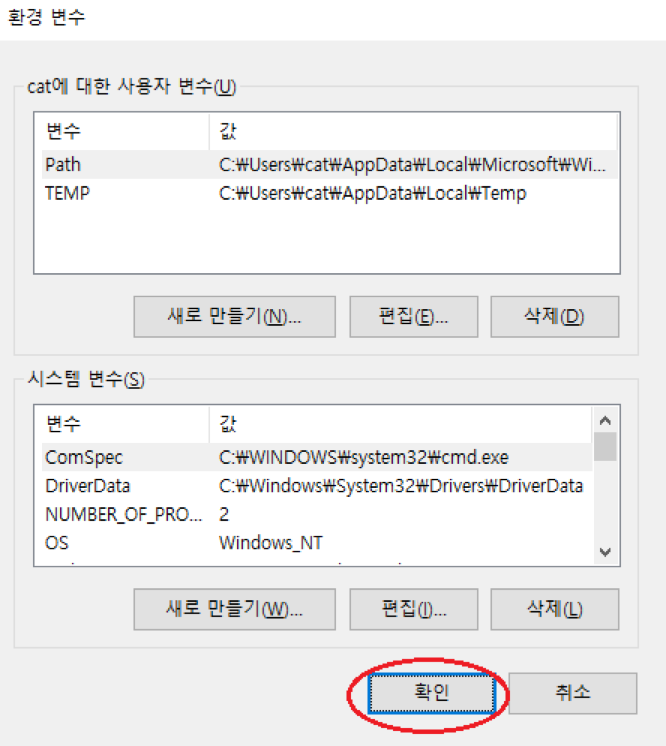
다시 확인을 눌러서 저장한 환경 변수를 시스템에 적용합니다.
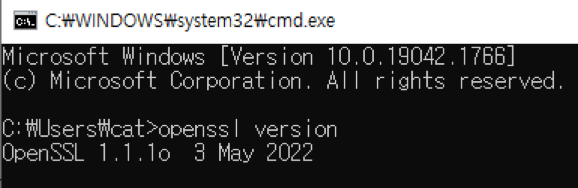
이제 새로운 커맨드라인 프롬프트, 또는 파워쉘에서 openssl 커맨드라인 프로그램을 사용할 수 있습니다.
Linux
Linux 의 경우 표준 설치를 하셨다면 대개 이미 OpenSSL 설치가 되어 있어서 사용 가능합니다.
[root@localhost ~]# openssl version
OpenSSL 1.0.2k-fips  26 Jan 2017
만약에 설치가 되어 있지 않다면, 배포판의 패키지 매니저를 사용하여 설치해줍니다.
Fedora 계열의 경우 (CentOS, Fedora, RockyLinux, Redhat Enterprise 등) 다음을 수행합니다.
[root@localhost ~]# yum install -y openssl
Debian 계열의 경우 (Ubuntu, Debian 등) 다음을 수행합니다.
[root@localhost ~]# apt install -y openssl
MacOS
MacOS 도 마찬가지로 대개 이미 OpenSSL 설치가 되어 있어서 사용 가능합니다.
bash-3.2$ openssl version
LibreSSL 2.8.3
만약에 설치가 되어 있지 않다면, Homebrew 를 사용하여 설치해줍니다.
bash-3.2$ brew install openssl
Homebrew 가 설치 되어 있지 않다면, https://brew.sh 에 방문하여 먼저 Homebrew 를 설치해주세요.